Thinking about getting your restaurant listed on Uber Eats but not sure where to start? You're in the right place! In this blog post, we're here to guide you through the simple steps to sign up your restaurant on the platform. Plus, we'll dive into the extra perks of teaming up with Uber Eats, including growth solutions like promotions, advertising, and their loyalty program.
Uber Eats is already a household name, which is fantastic news for your restaurant's visibility. They're present in the food delivery scene in over 500 cities across 24 countries! Even if you've already partnered with another delivery service or have a competing app on your smartphone, here's the deal: most people have at least two food delivery apps installed on their phones.
1. Go to the Uber Eats website and click add your restaurant

2. Fill out your restaurant's information
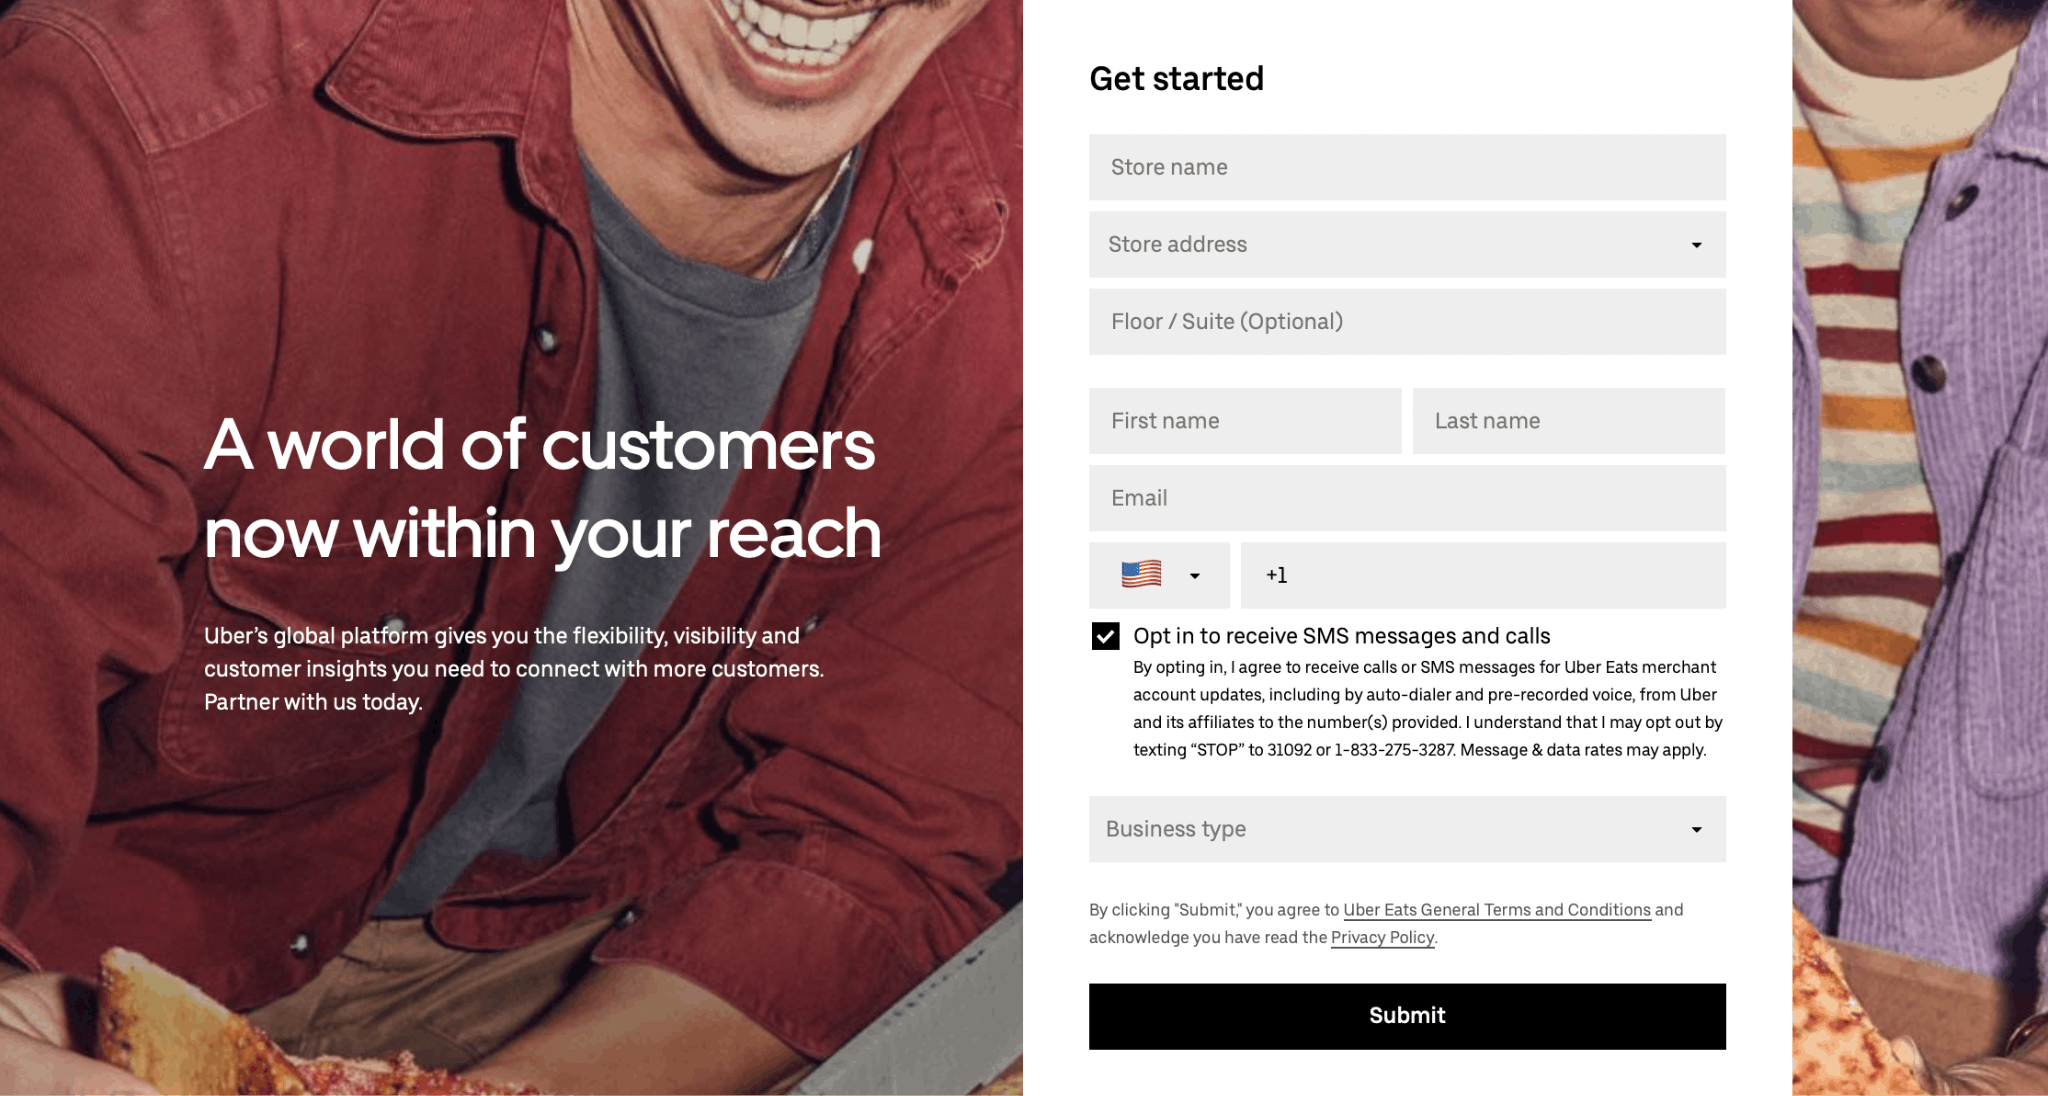
Uber Eats will provide you with the prompts in the image below.
Once you’re on the Uber Eats for Restaurants page, fill out your restaurant name, address, name, email, and business type and press submit. Make sure the email address and mobile number are still active or can be contacted. Continue by clicking the Submit button.

3. Wait for partnership confirmation from Uber Eats
After you fill out the form, Uber Eats will contact you and provide you with onboarding information, including a tablet with the online ordering software and a session to guide you through the process.
You will also receive pricing and delivery information and logistics based on your restaurants size and the number of locations. To cover the cost of the software, you'll have to pay a one-time activation fee that covers the welcome kit, tablet, and ordering software/photography for the platform.
Pricing & Fees
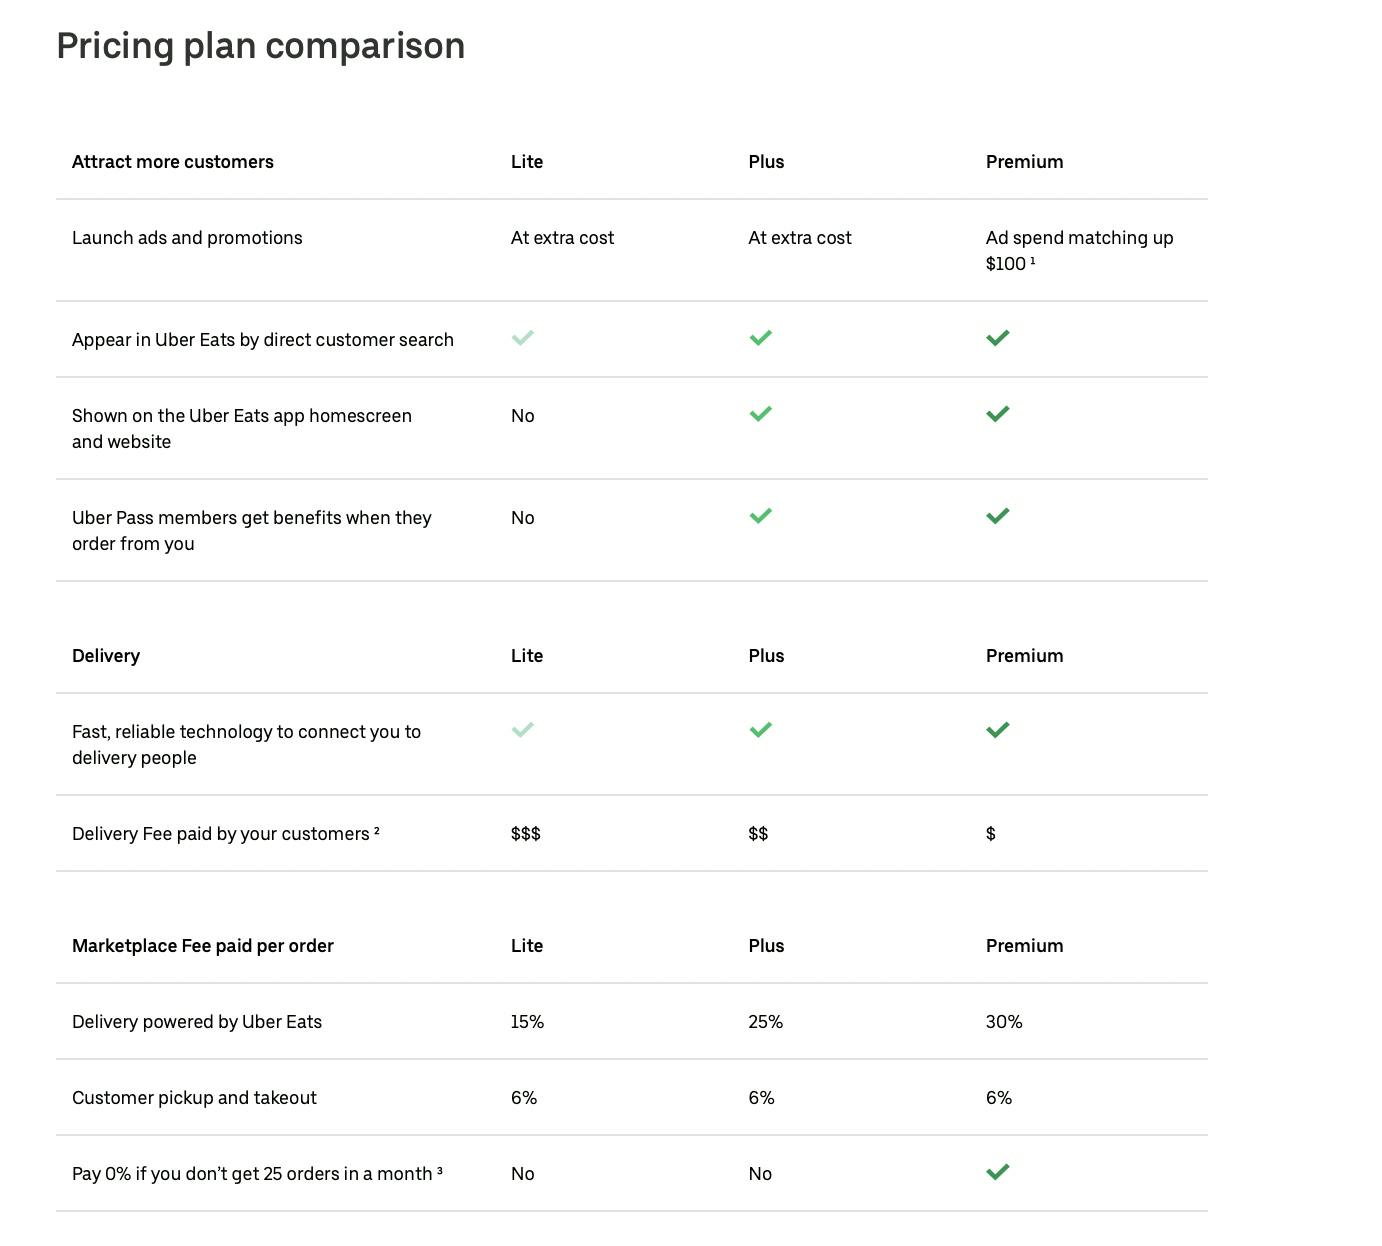
During onboarding, an Uber Eats rep will discuss your pricing options. On average, restaurants pay a 30% commission fee on orders, compared to 15% if you use your own delivery staff. There are three different plans available: Lite, Plus, and Premium.
Although the Plus and Premium packages come at a higher cost, they offer a better ranking on the app and ad spend for your restaurant. Look at the table below to see your options.

Complete your restaurant's registration with Uber Eats
Once you've had a peek at the pricing options, take a moment to decide which plan suits your restaurant best.
When it comes to jumping on board with a third-party app like Uber Eats, there are definitely pros and cons to consider, especially with those monthly fees. But keep in mind that joining up can give your restaurant a real boost in terms of visibility and resources.
Even if your restaurant is going with the Lite plan, there are plenty of nifty ways to organically improve your ranking. You can do things like speeding up your prep time, boosting those star ratings, updating your business hours, adding some unique offerings, and investing in some mouthwatering photos.
Once your restaurant is all set up on Uber Eats (or any other third-party app for that matter), you can make your life a whole lot easier by using Otter's Order Management to manage all orders in one place. If you're not an Otter partner yet, sign up here!